
Slipstreaming and Boot CDs
Introduction
Slipstreaming is the process of Integrating a Service Pack into the
install so that the Operation System and the Service Pack are installed
at the same time. This is normally done in corporations on network
shares. While this is great until you realize you can't just burn the
new files onto another CD and retain the nifty boot from CD option. So
this guide was created to help you slipstream the OS and then transfer
it to a Bootable CD. This guide assumes you are trying to create the
slipstream CD from a working version of the OS. You will need the
following to complete this:
Windows 2000 or
Windows XP (Home or
Pro) Original CD (OEM, Volume, or Retail)
Easy CD Creator 5.0 or
Nero Burning ROM 5.5
Bart's Boot Image Extractor
Windows 2000 or Windows XP based OS installed (Administrator Access
Required)
500 MB - 1GB Free Space on your PC
BTW, for all you corporate administrators this is legal for your
corporations: Check the
Windows 2000 Service Pack 3 FAQ or the
Windows XP Service Pack 1 FAQ for details. (Specifically under the
question "What has Microsoft done to make deploying Windows <insert your
version here> easier?")
"Slipstreaming" - Integrating the Service Pack into
the OS Install
First thing is to create the slipstreamed version of the
installer. To do this you need to get the latest Windows 2000 or
Windows XP Service Pack, depending on which OS you want to slipstream.
If you are downloading the SP off the internet you will need the
"Network Version". Ok, so lets get started:
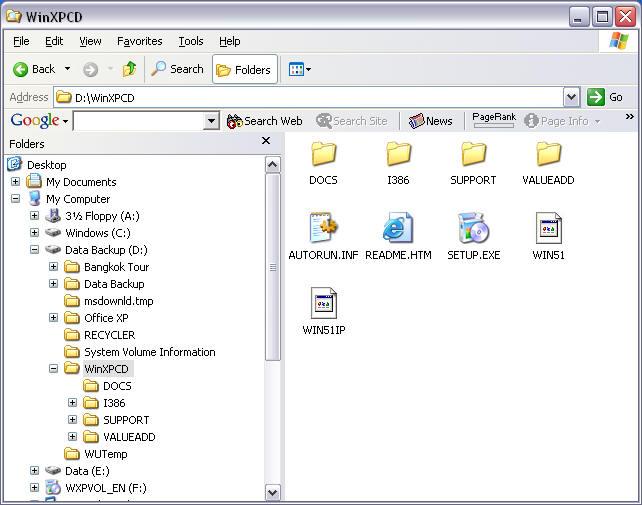
First copy the entire Windows 2000 or Windows XP CD to
your Hard Drive. I use the folder C:\WinXPCD for this example.
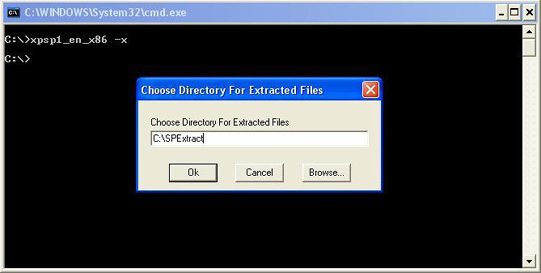
After that find the Service Pack file (Where ever you
downloaded it to, I use C:\) , use the -x switch to extract that to a
folder. I use C:\SPExtract for this example.
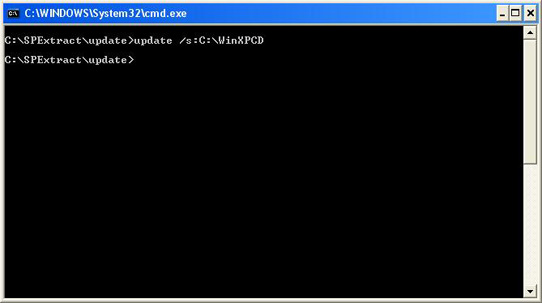
Once you have extracted the files from the SP, switch
over to the Update directory. In my example C:\SPExtract\Update. Use
the /s:(path to folder containing \I386 folder) switch on Update.exe .
In my example Update /s:C:\WinXPCD.
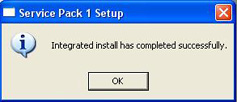
Wait for the installer to do it's thing.
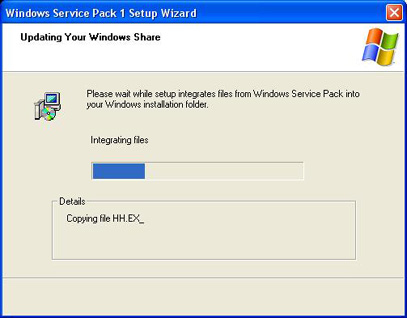
When you see this, slipstreaming is done, you are now
ready to make the Boot CD.
Create the Boot CD - Using Nero 5.5
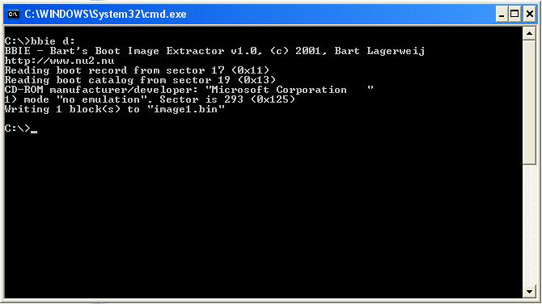
First off you need to extract the boot loader from the CD. Download
Bart's Boot Image Extractor.
Extract BBIE to a Folder. Open a command prompt and switch over to that
folder. Extract the image from the Windows 2000 or Windows XP CD. When
you are done copy the Image1.bin file to your local CD folder, in my
case C:\WinXPCD
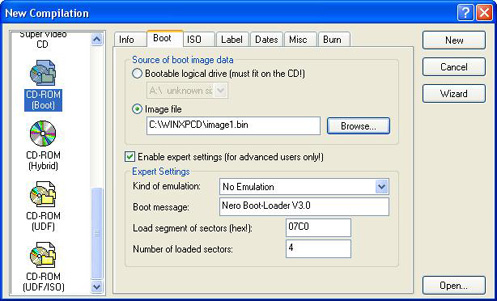
Make sure you have the latest version of
Nero 5.5. Open Nero, choose CD-ROM
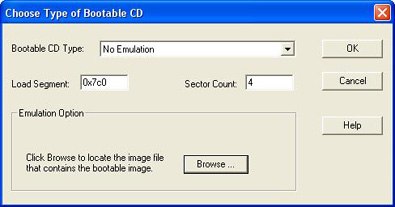
(Boot). Configure your Boot tab as follows, where the image file is the
image1.bin file you extracted from your Windows 2000 or Windows XP CD.
(Changing the Number of Boot Sectors to 4 is VERY important. If you
don't it will FAIL to boot)
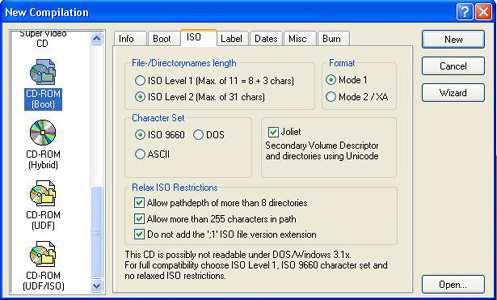
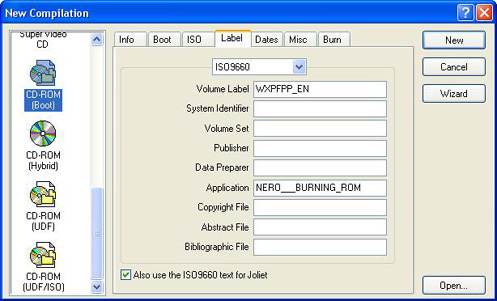
Configure the ISO tab as follows.
Configure the Label tab how you want, I recommend keeping the Volume
Name the same as the original CD.
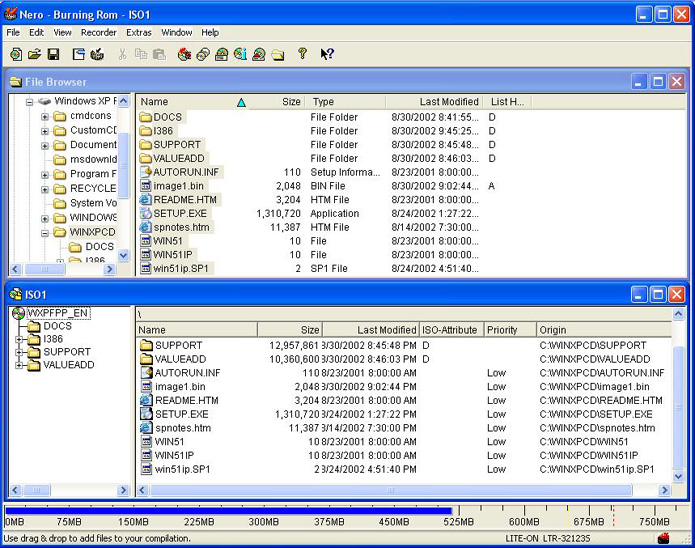
Copy the files into Nero. I keep a copy of the image1.bin file on the
CD so it does not have to be extracted for the next SP.
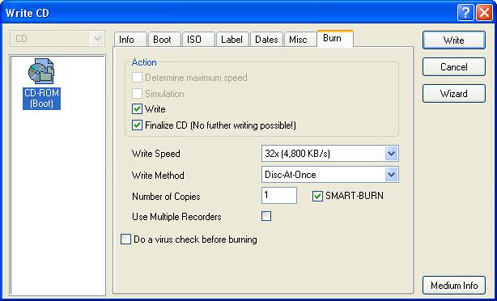
Burn the CD using the following options. (NOTE: Burn speed can be
set to whatever you want, 4X is guaranteed to work, faster rates vary.)
Wait until it Burns, and your done, you've just created a Bootable
Slipstreamed Windows 2000 or Windows XP CD.
Create the Boot CD - Using Easy CD Creator 5
Just like in the Nero instructions you need to extract the boot
loader from the CD. Download Bart's
Boot Image Extractor. Extract
BBIE to a Folder. Open a command
prompt and switch over to that folder. Extract the image from the
Windows 2000 or Windows XP CD. When you are done copy the Image1.bin
file to your local CD folder, in my case C:\WinXPCD
Make sure you have the latest version of
Easy CD Creator 5. Open Easy CD
Creator, choose File-> New CD Project -> Bootable CD

Set the Bootable CD Options as follows. (Changing the
Number of Boot Sectors to 4 is VERY important. If you don't it will
FAIL to boot).
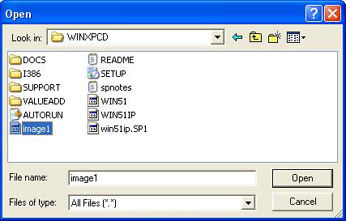
Click browse, and browse to the file you extracted from
the Windows 2000 or Windows XP CD. For my example the file is in the
C:\WinXPCD folder.
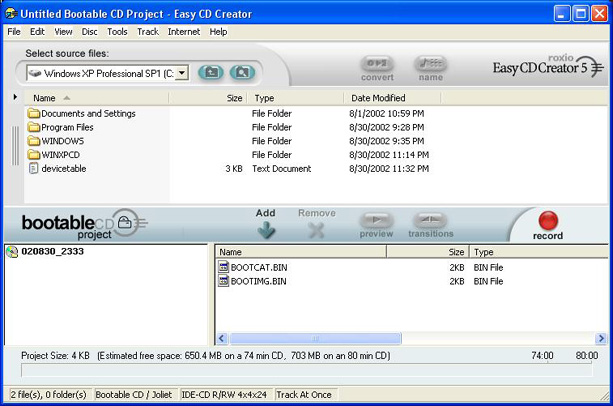
Easy CD Creator adds the BOOTCAT.BIN and BOOTIMG.BIN
files to retain the bootable CD
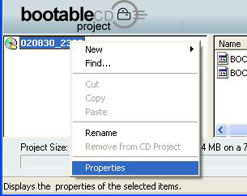
Click on the CD name and choose Properties
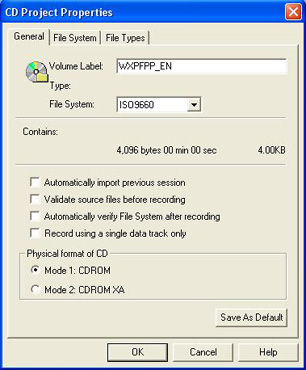
Configure the General tab as follows. I recommend
keeping the Volume Label the same as the original CD.
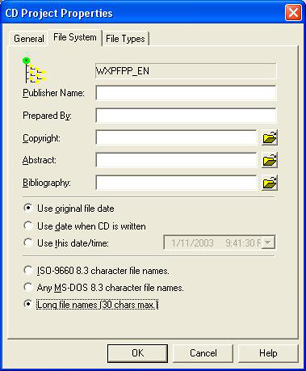
Configure the File System tab as follows. (Note: If you
get any errors with tildes "~" switch to MS-DOS 8.3)
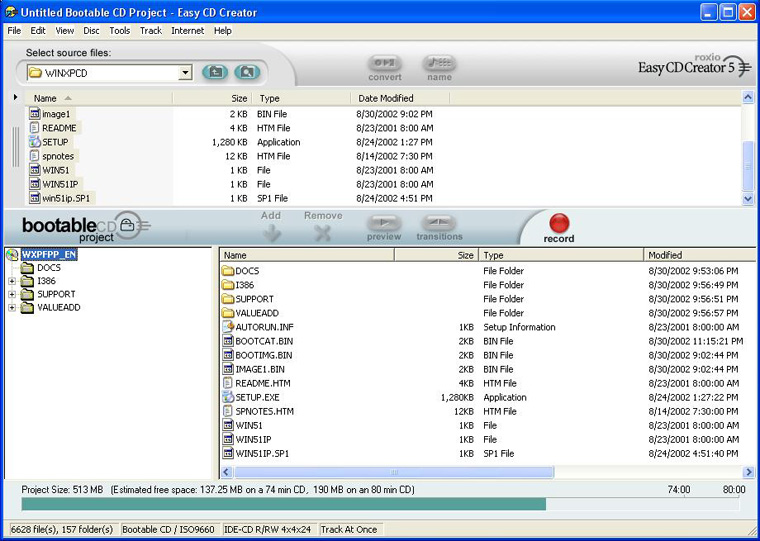
Copy the files into Easy CD Creator. I keep a copy of
the image1.bin file on the CD so it does not have to be extracted for
the next SP.
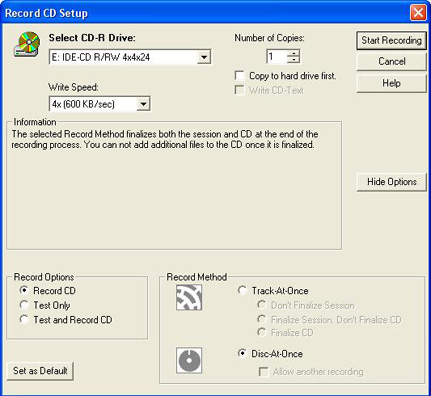
Click Record, and set your options as follows. (NOTE:
Burn speed can be set to whatever you wish, 4X is guaranteed to work,
faster rates vary.)
Wait until it Burns, and your done, you've just created
a Bootable Slipstreamed Windows 2000 or Windows XP CD.
Slipstreaming and Boot CDs
|